This document is intended to provide the instructions necessary to automatically synchronize the NB HMIs real time clock (date and time) to the CP1L system clock. There are many reasons that this may be desirable, such as clock consistency between machines, more accurate timestamp on error logs, etc.
While it is not covered in this article, the EtherNet port on CP1L also supports Automatic Clock Adjustment using NTP (Network Time Protocol). This function relies on a PC running the NTP Server, either locally in the customers facility, or externally using Internet servers such as ntpool.org or ntp-d.nist.gov.
1. Configure the PLC
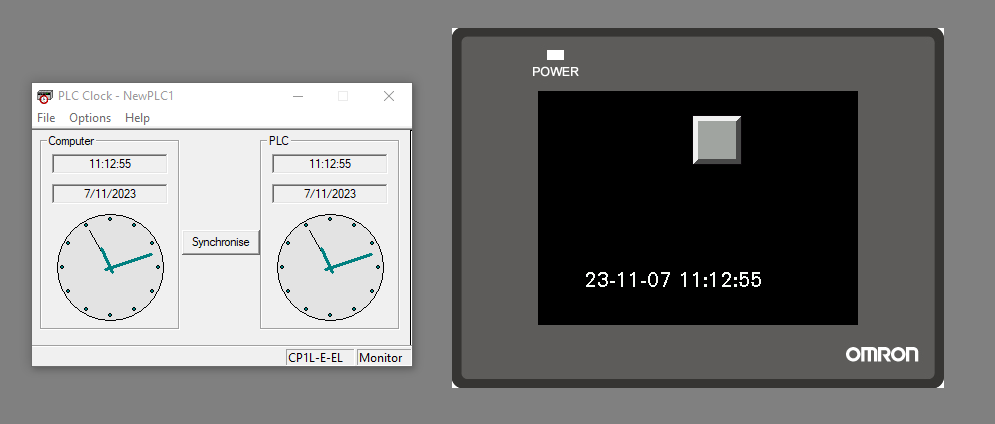
The PLC has a a real time clock (RTC) on board which tracks the current system time. The data is stored in memory in a BCD format.
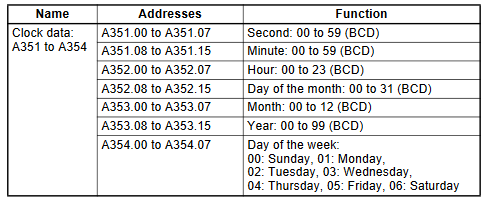
In order to use this data we must separate each increment into discrete words and convert them to binary.
- Initialise the target memory area -
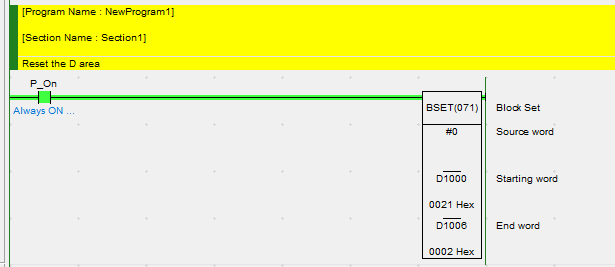
- Copy the digits from the A area to the D area
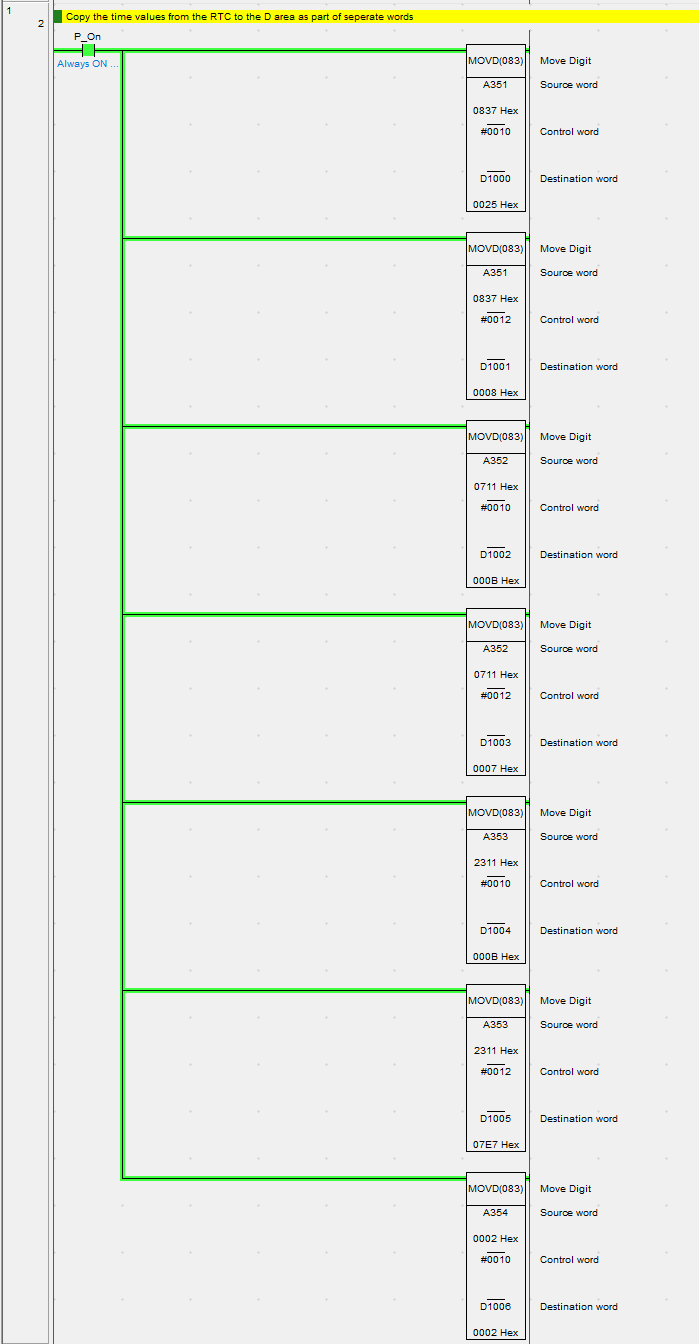
- Convert from BCD to binary. Add 2000 to the year.

2. Configure the HMI
The RTC is stored in the LW area on the NB screen. We will need to configure a function that automatically transfers all the required words from the PLC to the NB screen. The Data Transmission tool can be used to accomplish this.
The RTC is structured as below on the NB screen.
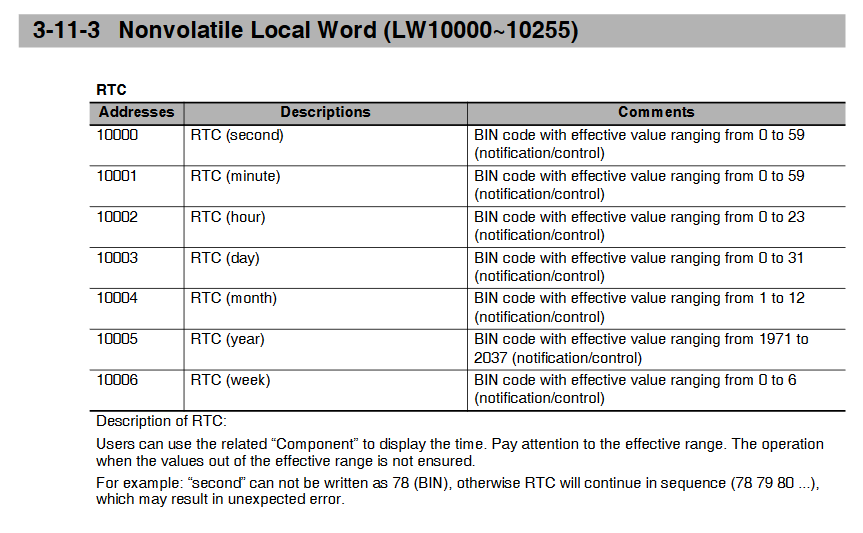
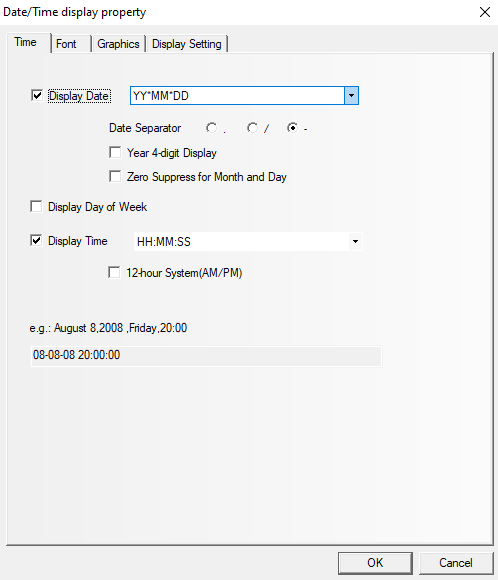
- Add a Date/Time component (Optional)
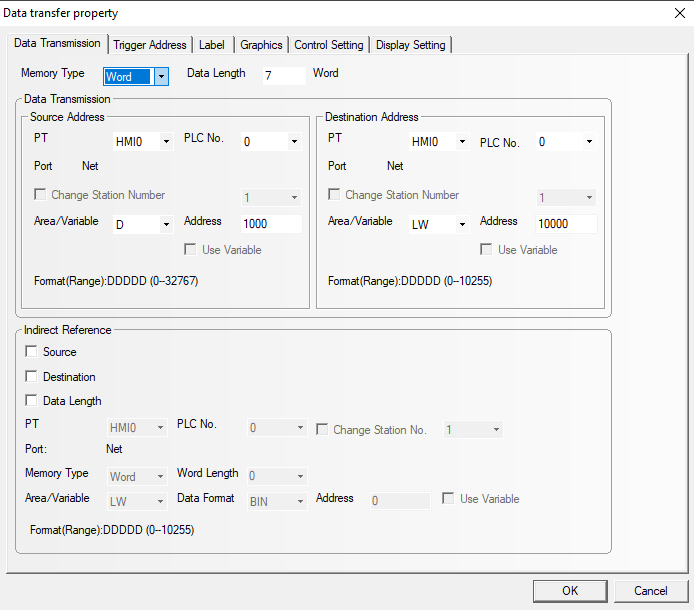
- Add a Data Transmission component. Set the Source word and result word. Ensure that the Data Length is set to 7.
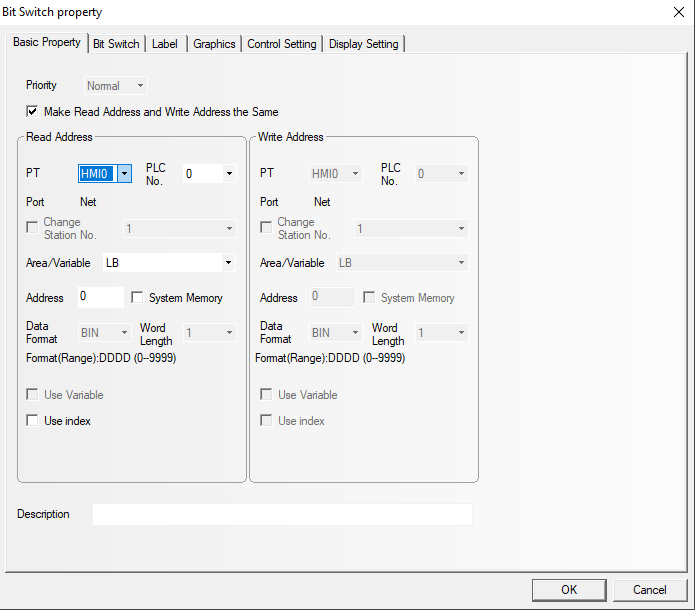
- Configure a trigger signal.

- Add a push-button to trigger the Data transmission.
The program has now been completed. When the push-button is pressed, the NB time will be synchronised to the PLC time.