Introduction
CX-Drive is a complementary software that allows users to monitor, program and backup parameters OMRON VSDs and servos. A free copy could be obtained by contacting your OMRON representative.
Starting CX-Drive and going online
-
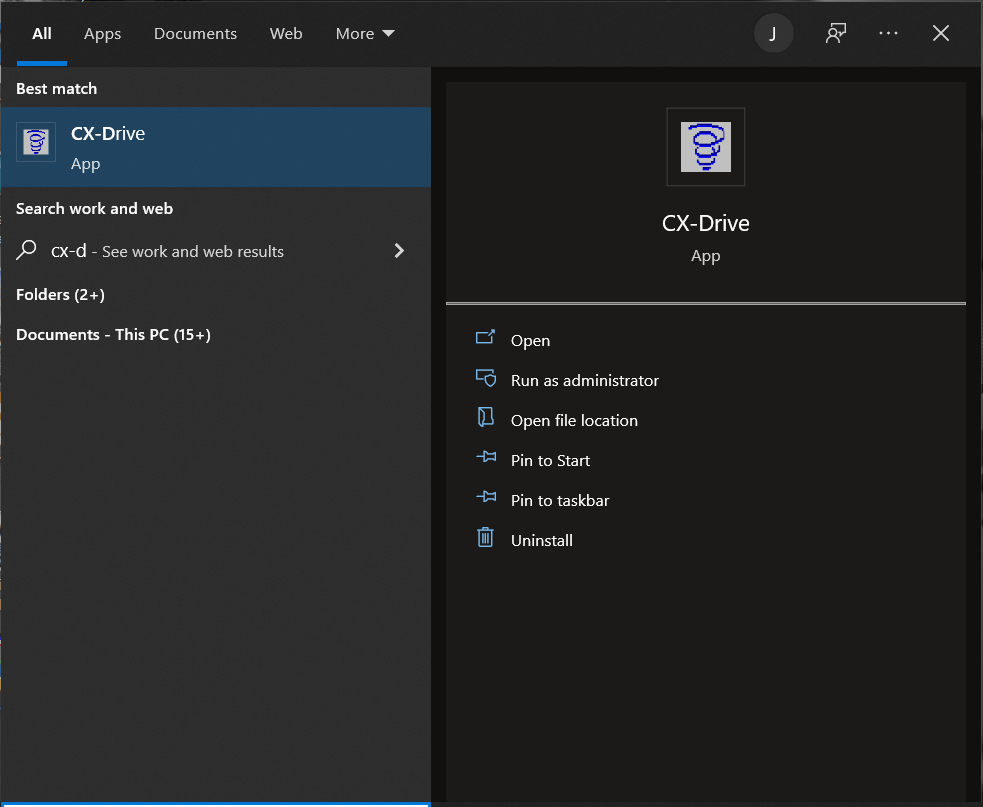
Start CX-Drive on any PC or laptop while being connected to the drive. It can be found by searching at "Start" or by exploring All Programs - > Omron - >CX One.
 In the case where CX-Drive does not appear while doing a search, it can be found at the following directory:
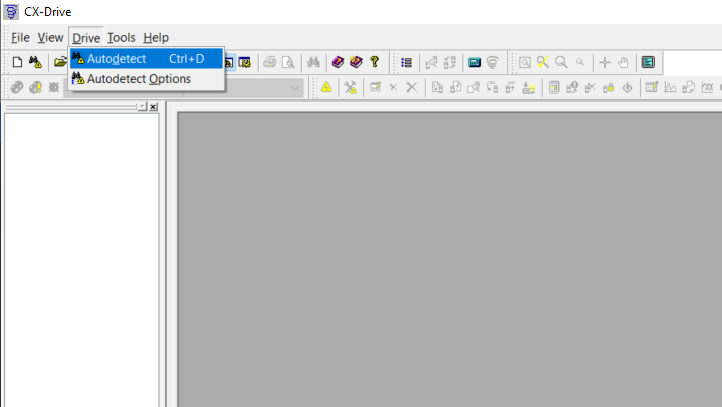
C:\Program Files (x86)\OMRON\CX-One\CX-Drive\CXDrive - Go into Drive->Autodetect.
-
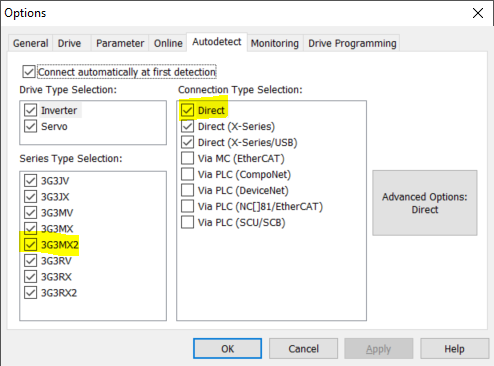
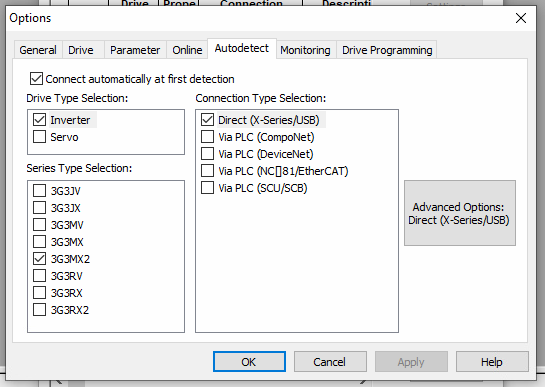
Make sure that the highlighted options are ticked depending on the intended model of the drive.
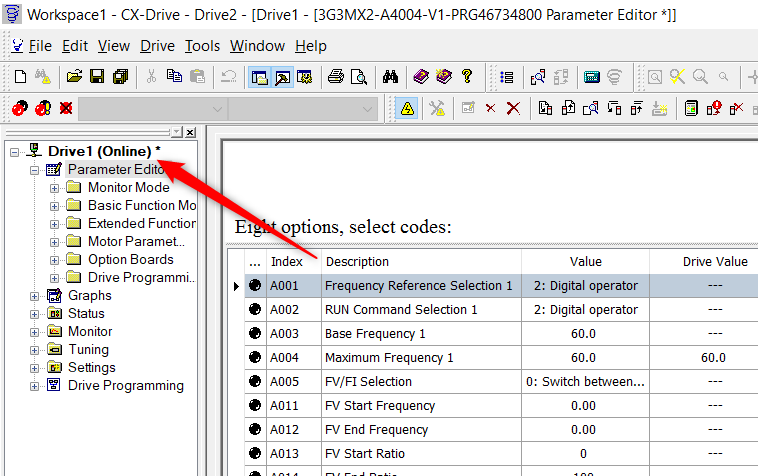
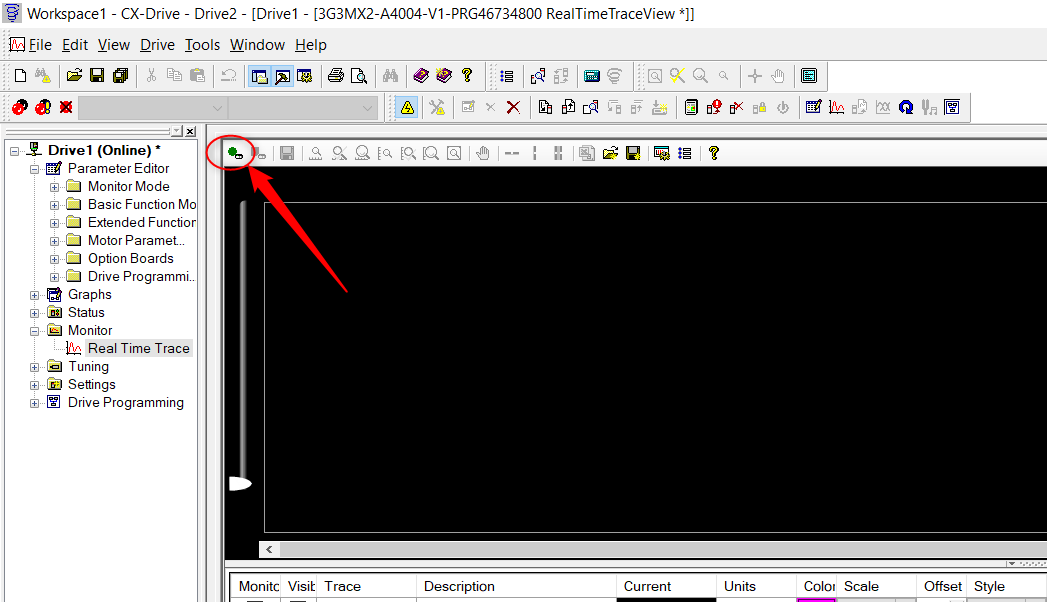
CX-Drive will look like the image below once it has gone online. The status will Online if CX-Drive has successfully connected to the drive.
Monitoring
The performance of the drive can be monitored through CX-Drive.
-
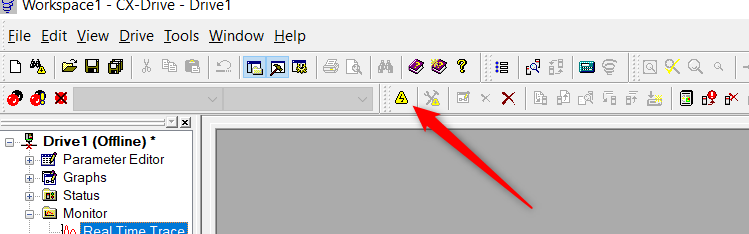
Make sure the drive is Online by clicking on the button below:
-
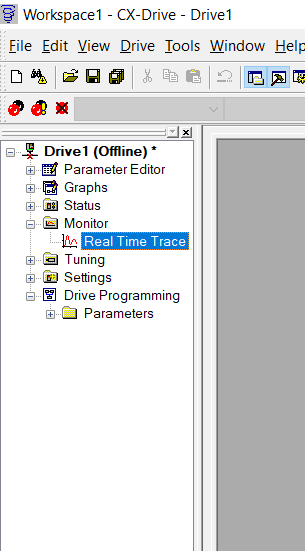
Go into Monitor -> Real Time Trace
-
Enable the parameters to monitor them.
The recommended variables are: d001 - Output frequency, d002 - Output current, d012 - Output torque, d013 - Output voltage.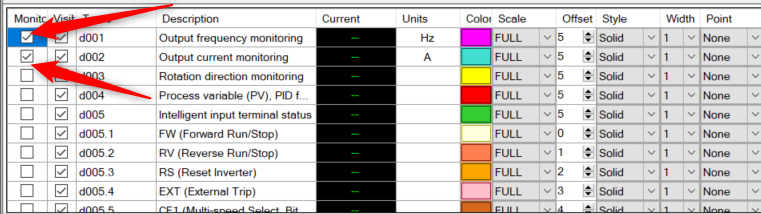
-
Click on the "Start" button to start real-time monitoring.
Working with parameters
- Transfer the parameters to/from your CX-Drive by going to Drive -> Transfer -> From Drive/To Drive.
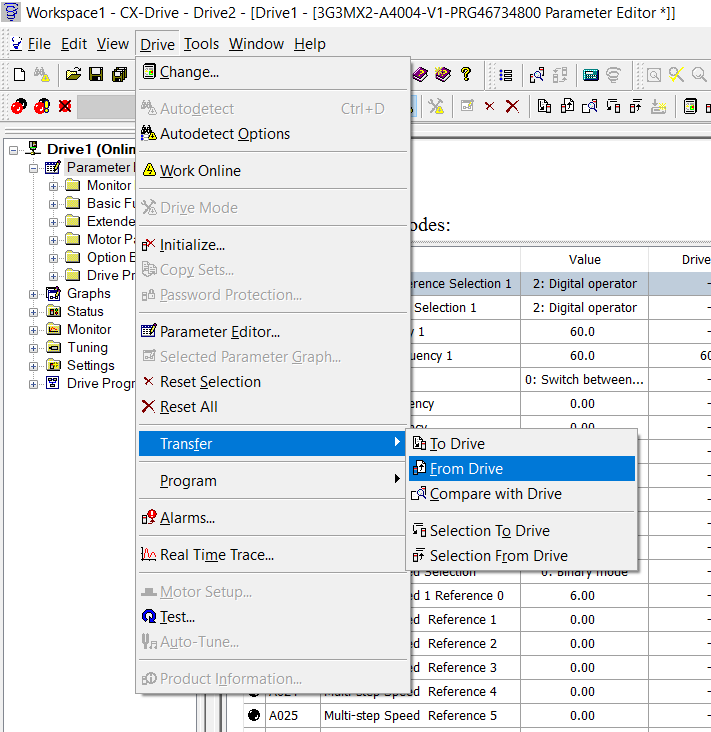 The parameters can also be compared to find the difference between the project and the drive by selecting "Comparing with Drive".
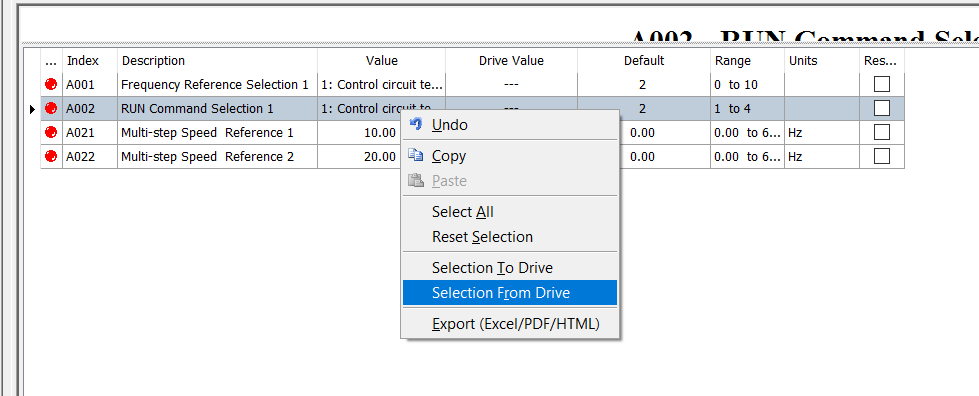
2. To partially transfer parameters, highlight the desired parameters and select "Selection to Drive". The same could be done for transferring from the Drive.
3. The buttons on the top left can be used to filter out the parameters:
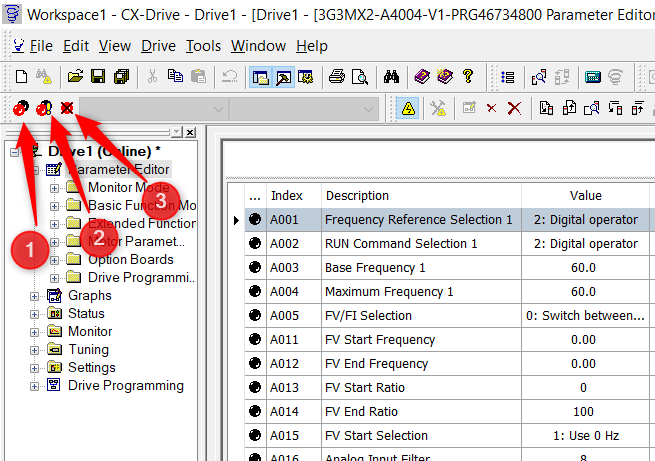
1: Parameters that are not the default value in the project
2: Parameters that differs from the value in the drive
3: Parameters that have an invalid value
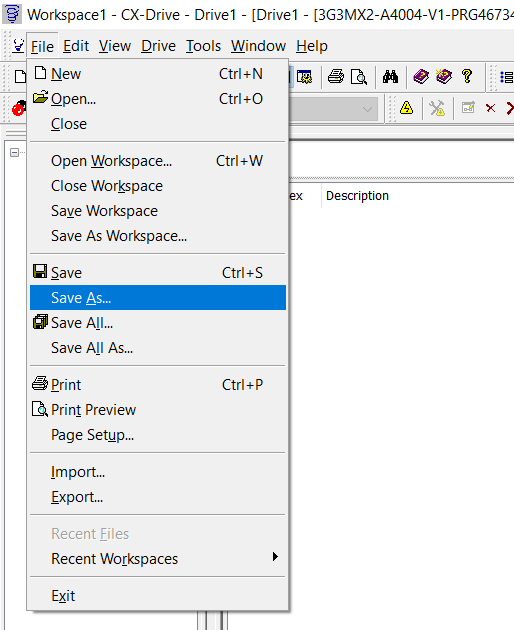
4. Save the parameters by backing up the entire project.
Unable to go Online
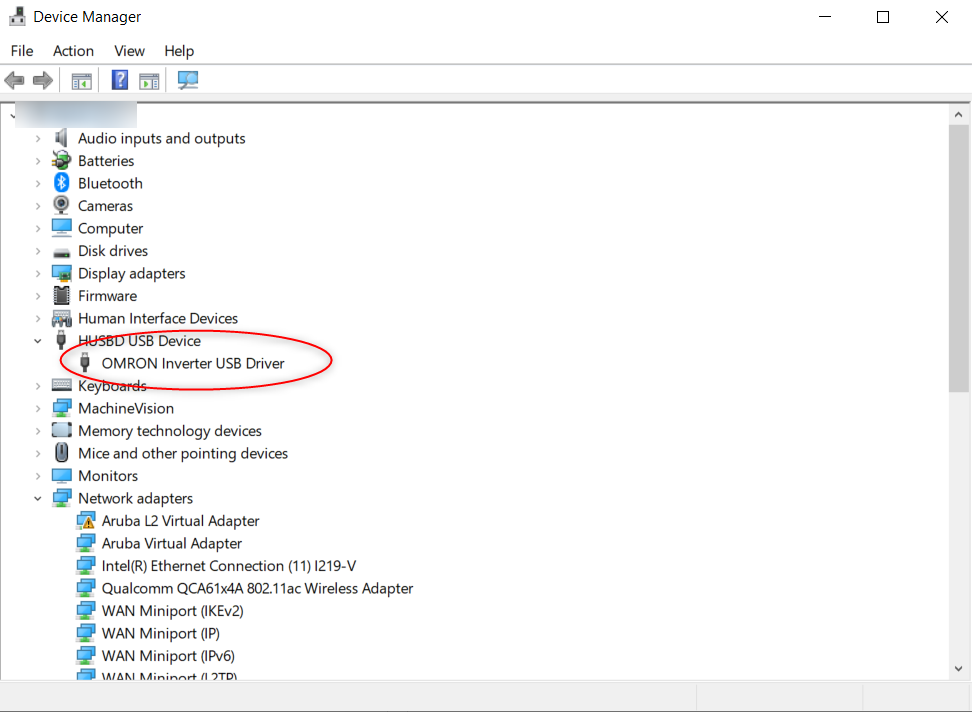
- Make sure the USB is connected to the PC. Verify this by going into Device Manager and checking if the device is showing up correctly. The image below shows when the USB is plugged in and is functioning correctly.
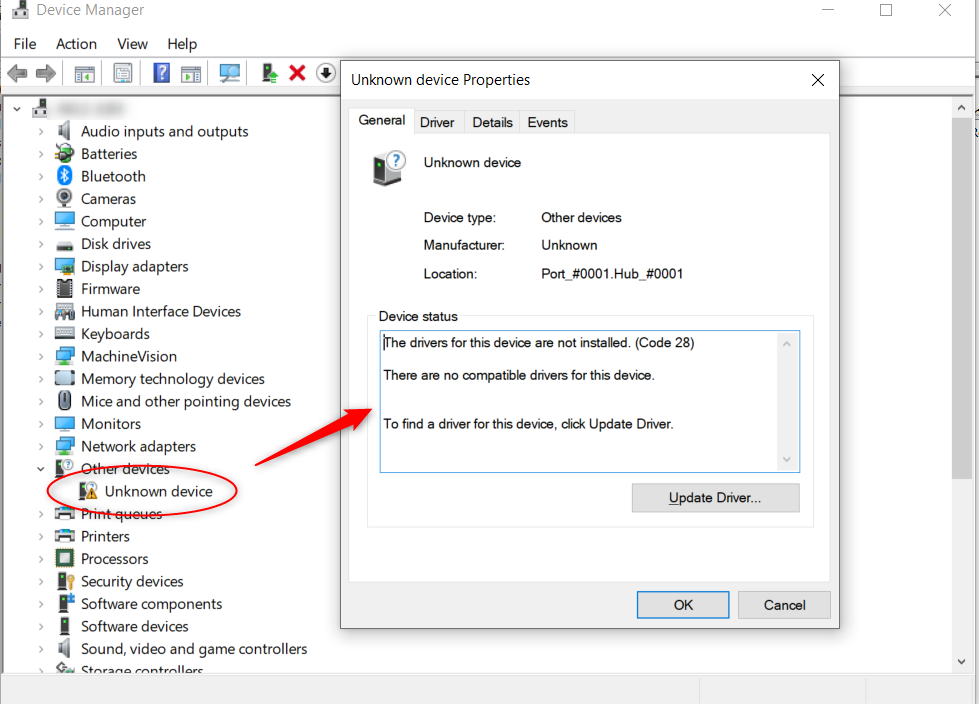
- If the USB driver is not showing up, look for an unknown device or a faulty device as seen below:
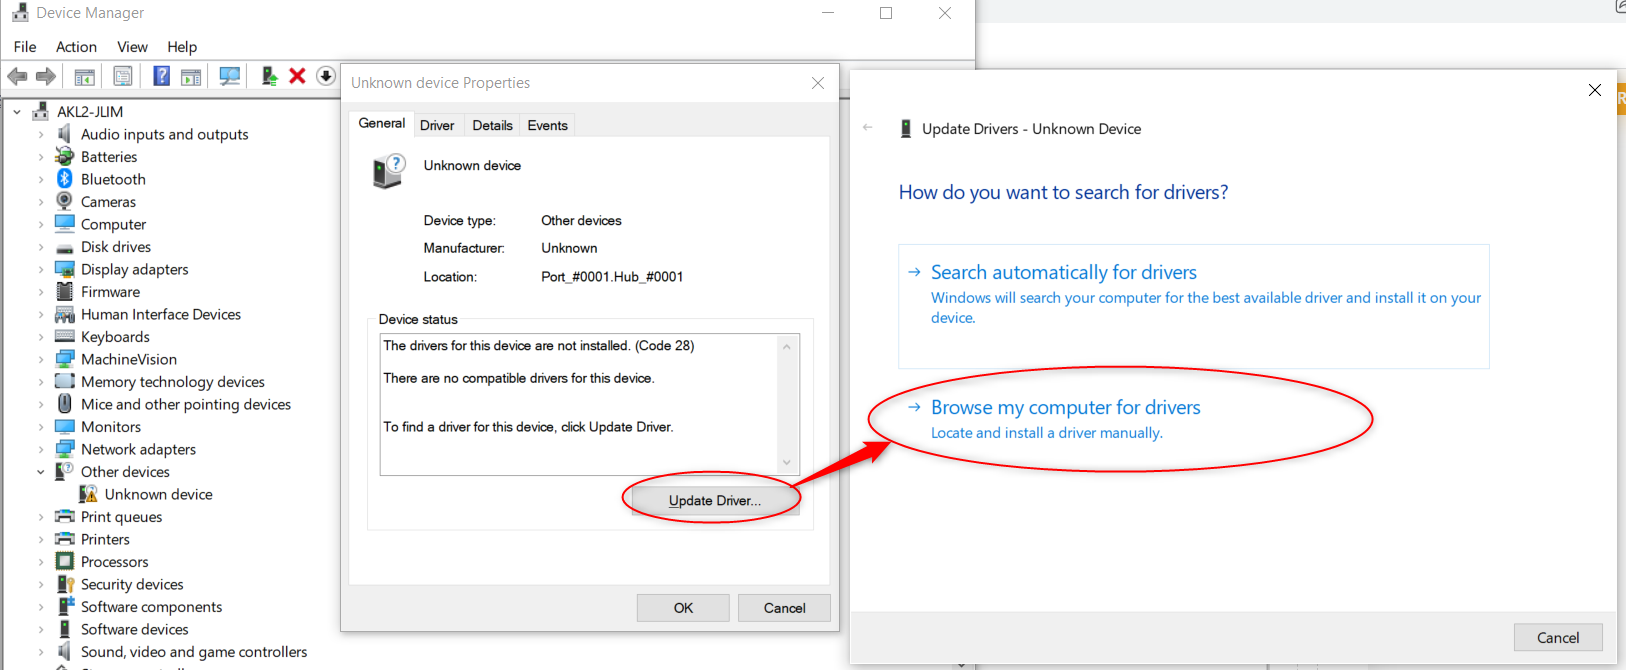
- Select Update Driver -> Browse my computer for drivers
- Select the following pathing for the driver: C:\Program Files (x86)\OMRON\Drivers
or alternatively in C:\Program Files (x86)\OMRON\CX-One\CX-Drive\DRIVERS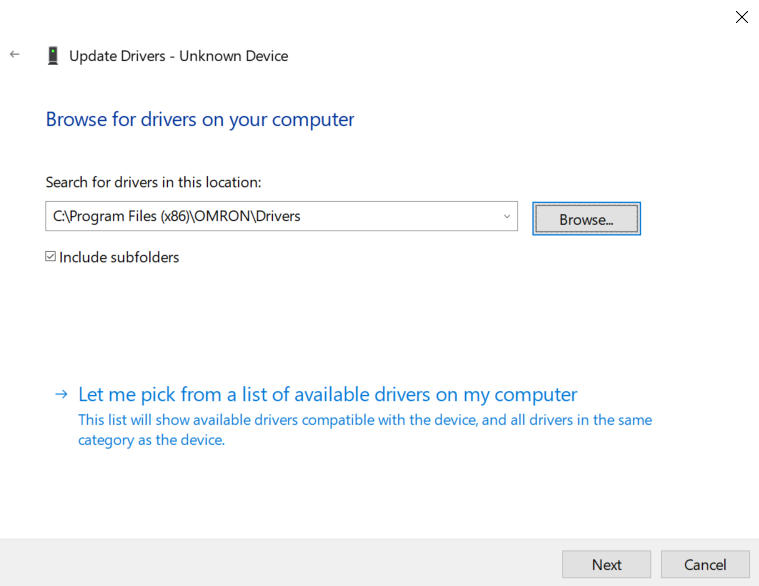
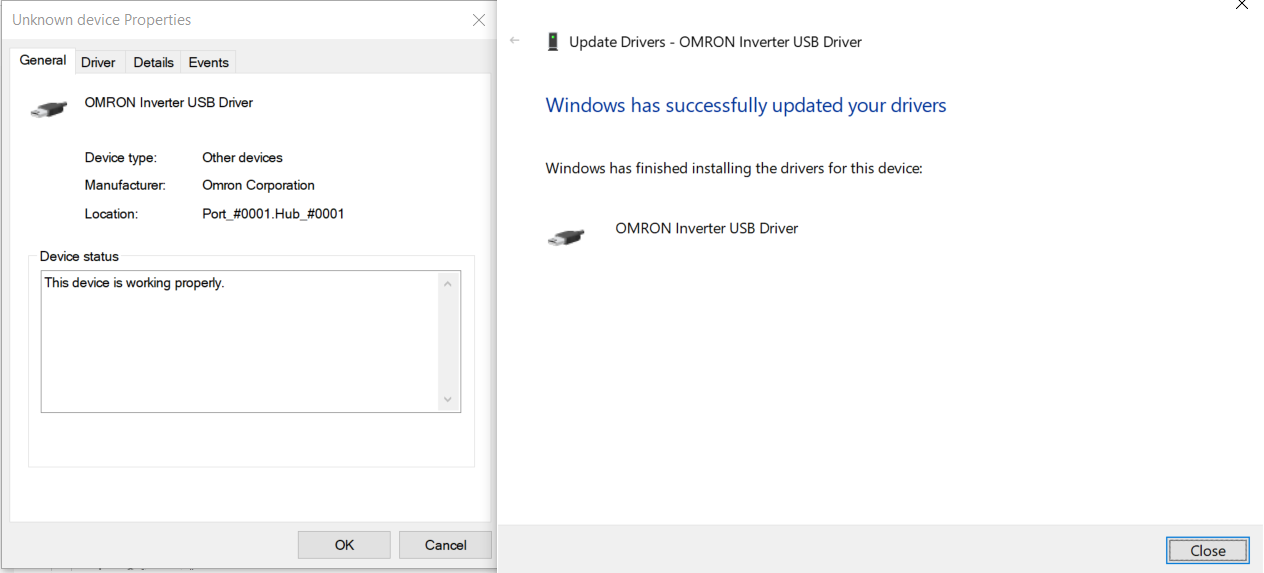
The drive should be accessible through CX-Drive after the update.
Delete
Unable to autodetect
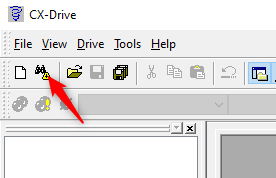
- Open CX-Drive and click on the Autodetect icon.
- If the Autodetection fails, click on Settings.
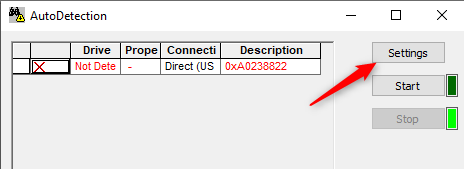
- Make sure the correct range of VSD or Servo is selected.
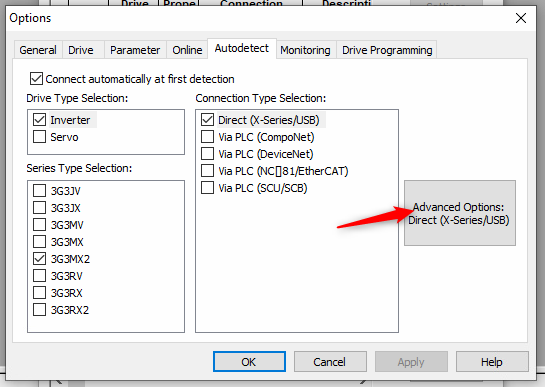
- If Autodetect still fails, go back to the Settings and open Advanced Options.
Make sure a port appears in the left panel and tick all the boxes in the Unit Selection panel: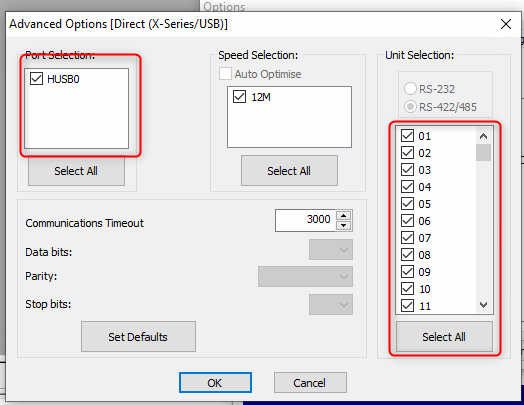
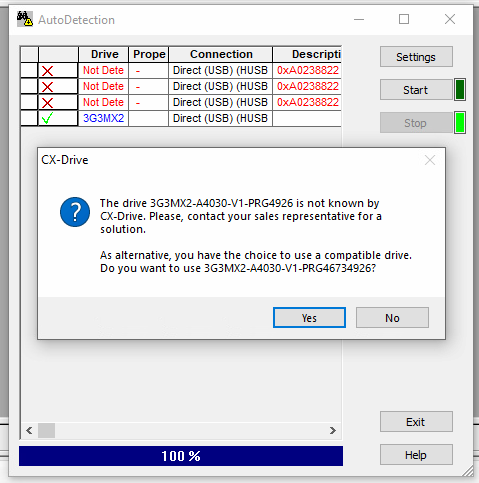
- Press OK and start the scan again. You might get an information message, click Yes to proceed.